Homeowners who seal air leaks and add insulation save an average of 15% on heating and cooling costs, according to EPA’s ENERGY STAR program, and about 11% on total energy bills. Tackle both projects together and the agency puts the combined annual savings at up to 10% on your whole energy bill. None of that requires a contractor. It requires a caulk gun, a can of spray foam, and about a weekend spent finding the six places most houses actually leak.
Time: 4-6 hours spread over a weekend. Cost: $60-120 total for materials. Difficulty: Beginner, no permits or special tools beyond a caulk gun and a utility knife.
What You’ll Need
- Paintable exterior-grade sealant (a flexible acrylic-latex/silicone hybrid such as DAP Dynaflex 230)
- One or two cans of expanding spray foam sealant (Great Stuff or similar) plus a low-expansion “window and door” formula
- Foam board insulation (rigid XPS, cut to size) for rim joists
- Adhesive-backed weatherstripping (V-strip or foam tape) and a door sweep
- Foam gasket inserts for outlets and switch plates
- A caulk gun, caulk smoothing tool, utility knife, and disposable gloves
- Safety glasses and a respirator rated for organic vapors if you’re spraying foam in an enclosed crawlspace or attic
The Six Leak Points, in Order of Impact
- Seal the attic hatch or access panel first. This is the single biggest air leak in most attics, and it’s the one homeowners skip because it’s out of sight. An unsealed hatch acts like a permanently cracked window straight into your conditioned living space. ENERGY STAR’s attic guide recommends running a bead of caulk or foam weatherstripping around the frame where the hatch meets the ceiling, then attaching rigid foam board to the back of the hatch cover itself so it insulates as well as seals. Budget 30-45 minutes and under $15 in materials.
- Foam the rim joists in the basement or crawlspace. The rim joist, also called the band joist, is the wood framing that sits directly on top of your foundation wall, and it’s usually the least insulated part of the entire house. Cut rigid foam board to fit snugly between each joist bay, then seal the perimeter with expanding spray foam so no air gap remains around the edges. DuPont’s Froth-Pak application guide recommends spraying in thin passes rather than one thick layer to prevent the foam from sagging or overflowing, holding the can six inches from the surface, and ventilating the space for at least an hour afterward. Plan on two to three hours for a full basement perimeter and $30-50 in foam and board.
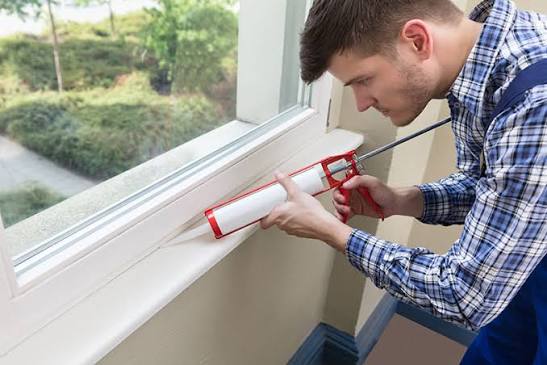
- Caulk the window and door trim, then weatherstrip the moving parts separately. These are two different jobs and conflating them is the most common mistake in this whole project. Caulk is for anything that never moves: the gap between the exterior window or door frame and the siding or brick. Weatherstripping is for anything that does move: the sash of a double-hung window, or the door itself where it meets the jamb. Applying caulk to a moving joint just cracks and fails within a season. For the caulk, DAP’s application guide recommends cutting the nozzle to match the width of the gap, running a steady bead in one direction, and smoothing it within ten minutes before it skins over. For weatherstripping, press adhesive-backed foam or V-strip into the channel where the sash or door contacts the frame, and add a sweep to the bottom of exterior doors. Figure 20 minutes per window, an hour per door, and $8-15 per opening.
- Install foam gaskets behind outlet and switch plates on exterior walls. Outlets on outside walls open directly into an uninsulated stud cavity, and you can often feel a draft with your hand. Unscrew the cover plate, drop in a precut foam gasket, and reattach. It’s a five-minute job per outlet and the gaskets run $5-10 for a multi-pack covering a dozen outlets.
- Seal around plumbing and HVAC penetrations. Anywhere a pipe, wire, or duct passes through an exterior wall or the attic floor, there’s usually a gap around the penetration that was never sealed during construction. Use a minimal-expansion spray foam (standard high-expansion foam can bow pipes or crack drywall) and fill the gap flush with the surface. This takes 15-20 minutes per penetration and one can of foam covers several.
- Fix the fireplace damper. A damper that doesn’t close tight is essentially a chimney-sized hole in your roof, even when the fireplace is unused. If your existing damper won’t seal fully, an inflatable chimney balloon or a top-sealing damper installed at the top of the flue are both effective retrofits, and either stops warm air from pouring straight up the chimney all winter. Expect $30-80 and about 30 minutes for a balloon, or a professional install for a top-sealing unit.
When to Call a Pro Instead
If you’ve sealed all six spots and still feel a draft you can’t source, or a blower-door test shows leakage you can’t visually locate, that’s the point to bring in a certified home energy auditor rather than keep guessing with caulk. The same goes if your attic insulation itself looks thin or compressed. Air sealing without adequate insulation on top of it leaves most of the savings on the table.
Leave a Reply