A kitchen can be perfectly sound and still not be the kitchen you want. That is the spot UK DIY renovator Vicky found herself in. Her kitchen has glossy cream units, a dark gray island and a worktop wrap that has seen better days. Rather than pay for a brand new one, she has set herself a budget of just £300 to turn the whole thing into a shaker style kitchen.
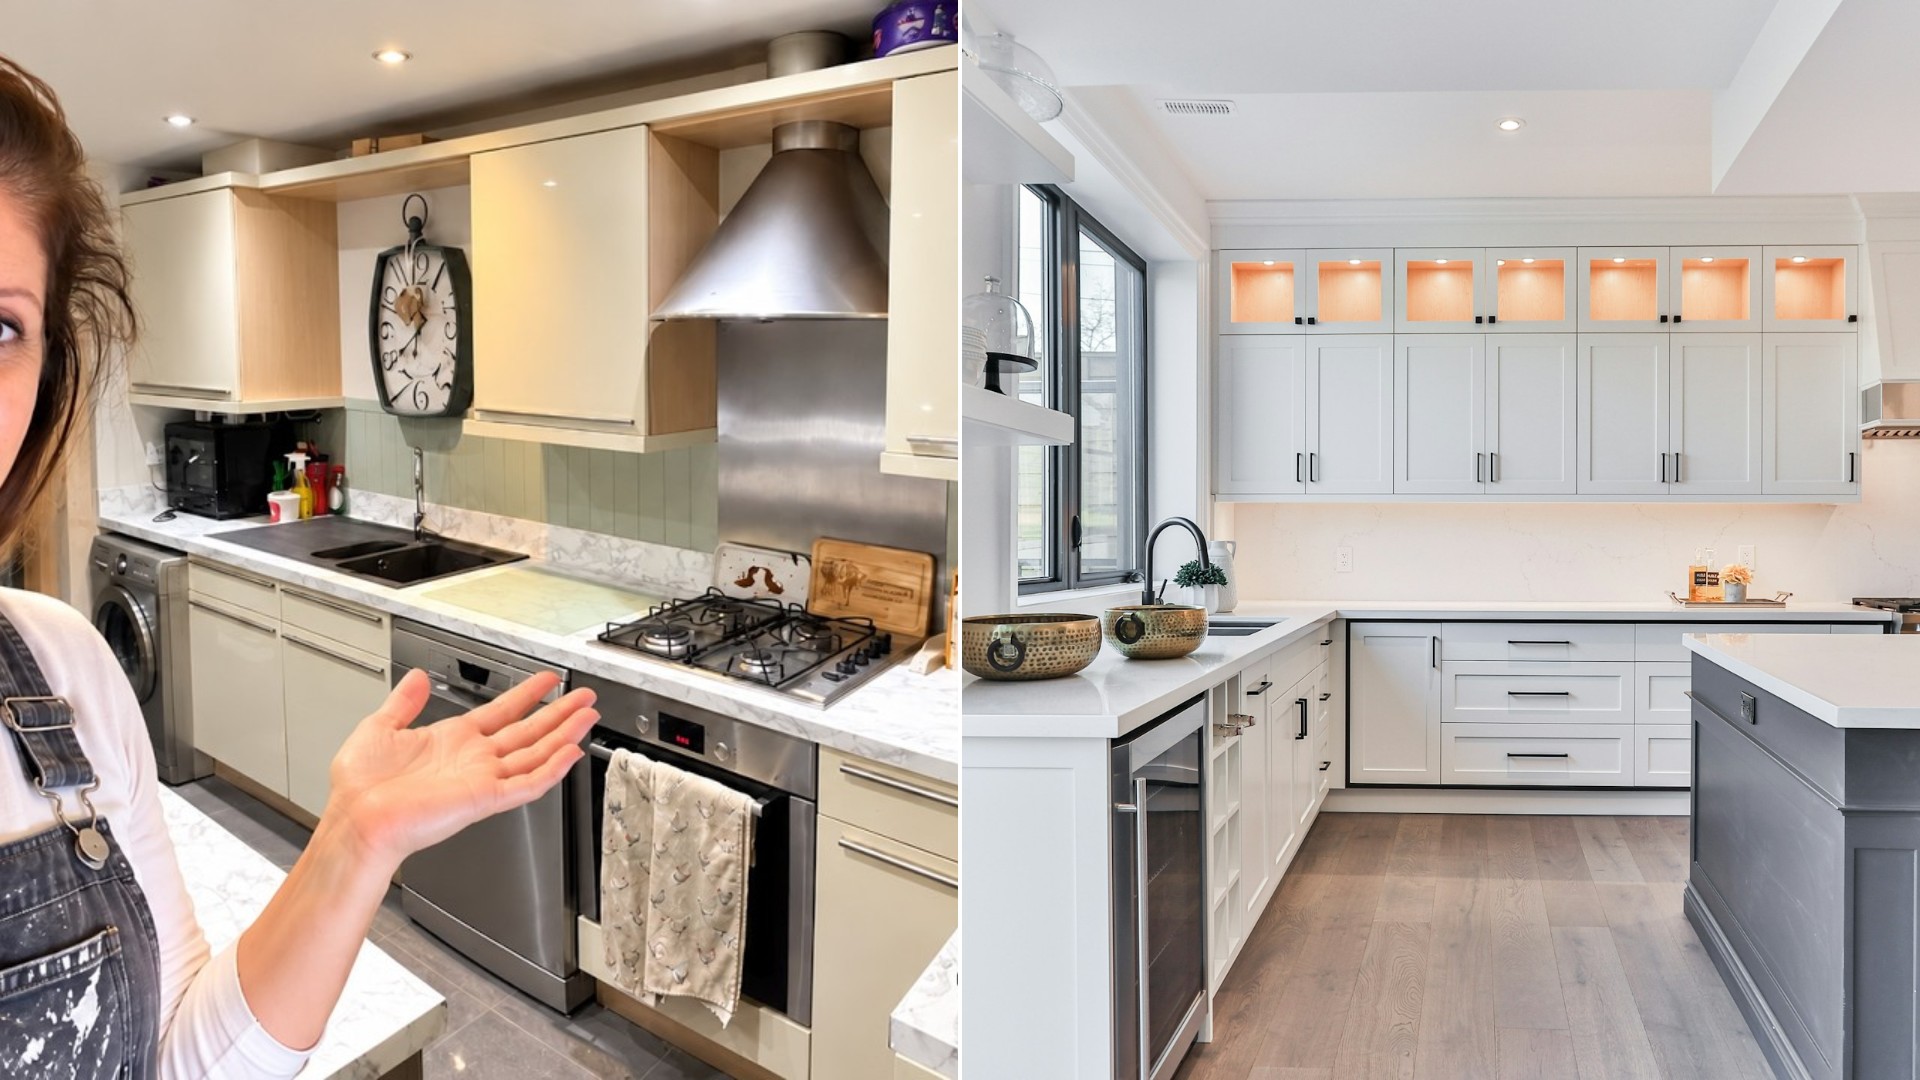
She is documenting the job week by week, and this first installment covers the units. By her own account, the kitchen is “completely fine really,” it just is not the look she is after. Replacing it was never an option with her budget, so she worked out another way to get the shaker look without spending £10,000 plus on a new kitchen.
The plan for the doors
The idea is simple on paper. Take off the handles and every door, wash the fronts down, then cut panels to stick onto the front of each door so the flat gloss slab suddenly looks like a framed shaker door. Those added pieces then need priming, caulking and paint. On the cream side of the kitchen she plans to stay with cream. On the island she is leaning toward a green that echoes the color of the paneling behind it, which she thinks will tie the room together.
She is honest about her nerves. She says she has never done anything like this before, although she has done a lot of research and believes it can be done. To keep the risk low, she is starting with one door first. She takes off the handle, gets the wood cut for it, fits it, and looks at the result before committing the rest of the kitchen.
What it cost so far
The number that caught our eye is the price of the wood. Vicky went to her local timber merchants and bought a big sheet of MDF, and they cut it into strips for her right there. The total, glue included, came to £17. That covers the strips for all the doors, so her running tally stands at £17 against a £300 budget. She expects paint to be the biggest expense, but she says she is still miles away from her limit.
There is a lesson in that for anyone planning a similar project. Many timber yards and builders merchants will cut sheet material to size for a small fee or even for free, which saves you the cost of a saw and the headache of wrestling a full sheet at home. It is worth calling around before you buy.
Prep work, step by step
The first job is the handles. Vicky says she is not quite tall enough to reach some of them properly and rounded off a screw head, so she grabbed a step and switched to a different drill attachment. Once the doors are off, she cleans them with sugar soap, spraying it on and wiping with a cloth. Sugar soap is a classic British prep cleaner that cuts through kitchen grease so paint can stick.
Next comes the cutting, and she admits it did not go perfectly. Her first strip came out about 2 mm short, so she cut another, and she says she cut the raw pieces too long to begin with. Once the strips are glued on, she points out, there is no going back. She even confesses that the doors look rough at this stage and that she wants to get primer on straight away. She says she will not feel less nervous until the primer is on.
She sands only the MDF pieces. The primer she bought says the gloss does not need sanding, which spares her a huge amount of work. She also uses wood filler, mixing only as much as she needs, because she says the tubs always seem to have dried out by the time she goes to use them.
Where the project stands
By the end of the week, everything has been primed and she has filled one side of the strips. The other side needs filling once it dries, then comes caulking and another light sand before paint can go on. She also still has paneling ends to fit and is still choosing which ones to buy, and whether they need priming depends on that choice.
Even so, she says it is already beginning to look different. The primer has changed the look of the doors, and she notes that the gray island now looks far closer to the cream than before. She admits the kitchen looks a bit of a mess at the moment, but says it should be okay. Next week she hopes to get paint on.
The worktop is the other big question. It is a wrap that has been on for about five years, and it has held up well, but it now has scratches along the worn edge and some stains. She is thinking of peeling it off once the cupboards are painted to see what is underneath, which she believes is a walnut wood effect worktop. If she does not like it, she may put another wrap on.
She also has bigger ideas in mind, including building the fridge its own little unit with proper storage, and she says she is excited about the kitchen looking Christmassy.
Tips if you want to try it
- Start with one door as a test. Vicky does it so she can judge the look before doing every door.
- Ask a timber merchant to cut your sheet into strips. Hers cost £17 with the glue.
- Clean first. Sugar soap on a cloth takes grease off the fronts.
- Check your primer. Hers says gloss does not need sanding, so only the new MDF got sanded.
- Measure twice. Her first strip came up 2 mm short, and once the glue is down there is no turning back.
Vicky’s project is a handy reminder that a dated kitchen does not always need a demolition crew. A saw, some glue, primer, paint and plenty of patience may be enough to give solid cabinets a whole new face, and so far the whole job has cost her less than a nice dinner out.
More Stories You May Like
- Gardener Strips A Tomato Plant Down To One Leaf And Lays It Sideways In A Trench So The Stem Turns Into Roots And Grows Bigger Tomatoes
- She Spends $40 To $50 A Week Feeding Two Working Adults, And Turns Spoiling Tomatoes Into Sauce, Soft Fruit Into Jam And Scraps Into Broth
- Homeowner Cleaning Out The Basement Notices A Damp Spot, Pulls Off A Section Of Wall, And Finds A Hidden Door Framed In Wood Behind The Block
Leave a Reply