You have snaked it. You have plunged it. You have done it all again for good measure, and the toilet still flushes like it has given up on life. Before you call a plumber or start planning a new bathroom, an apartment maintenance technician named Dave has a simple test that may save you a lot of grief, and it starts with a plain old bucket.
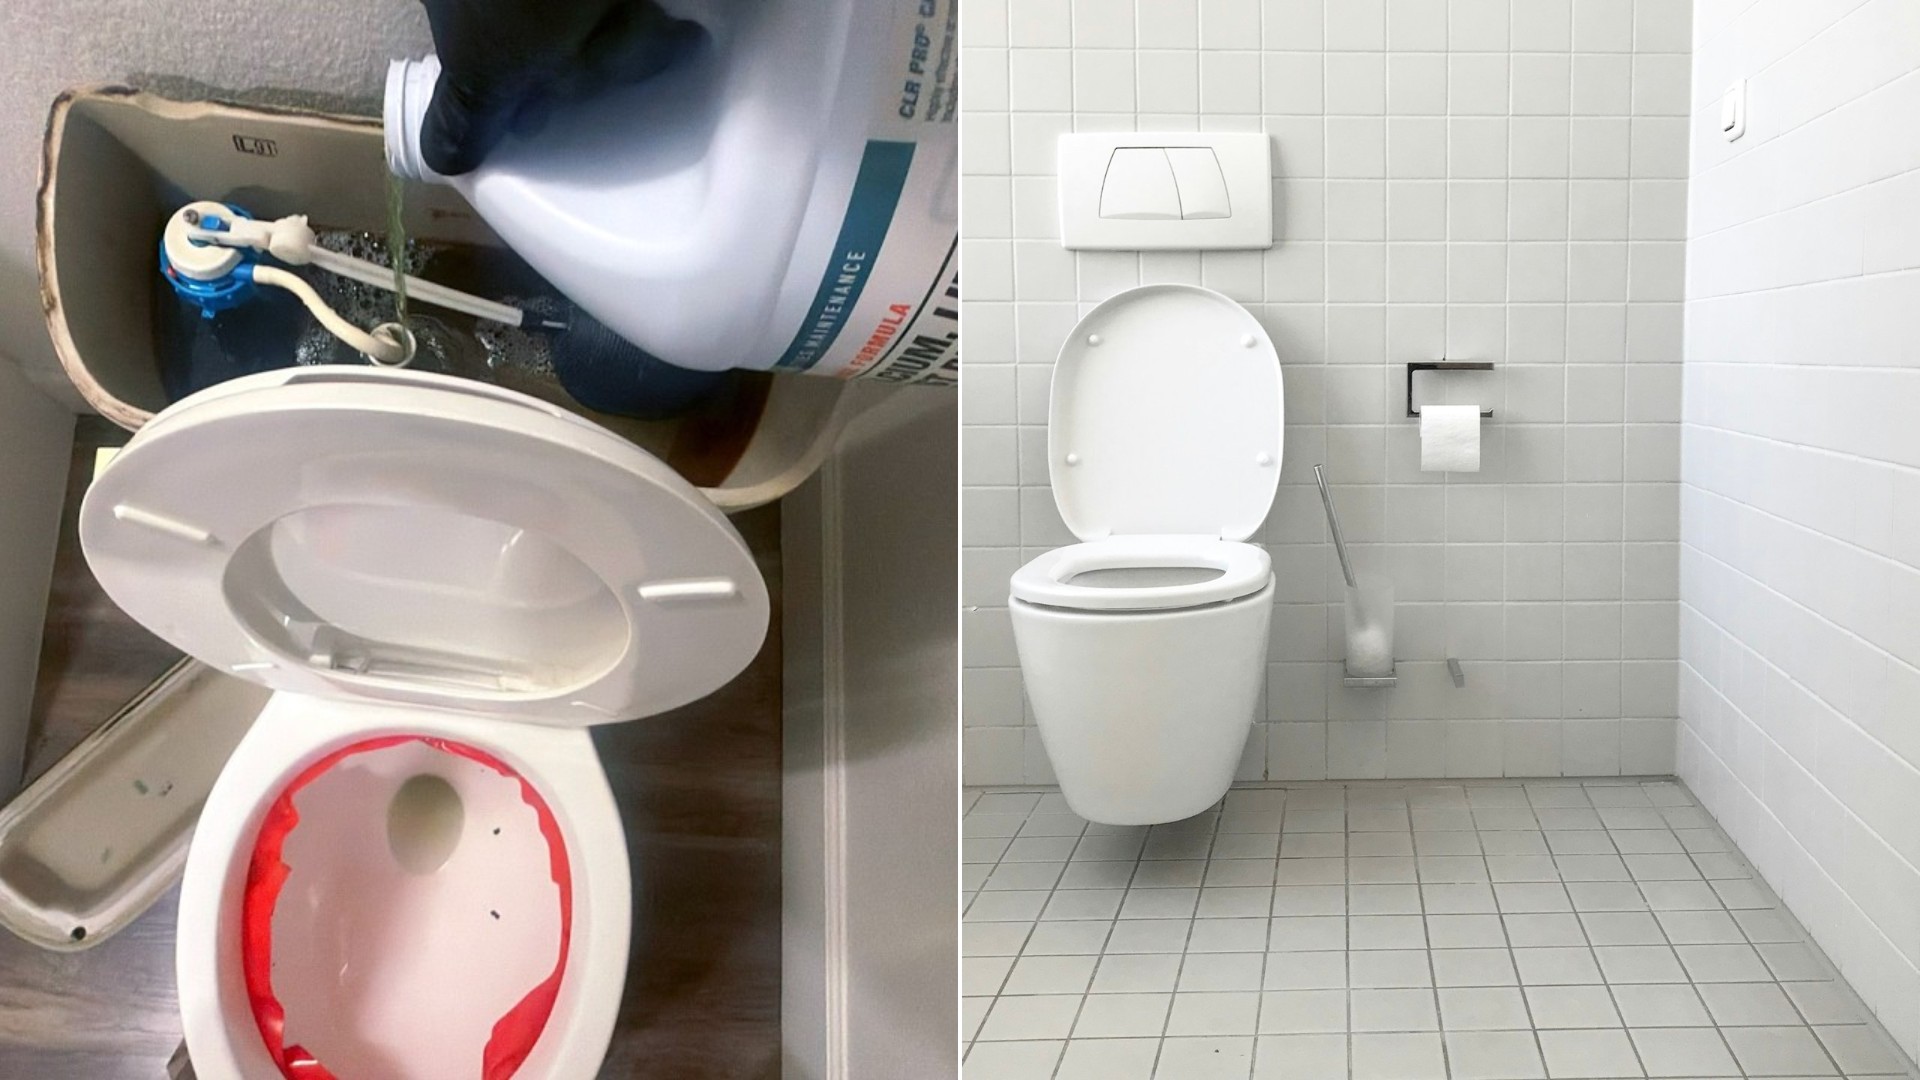
Dave runs maintenance calls at an apartment community and posts his repairs on his YouTube channel, Apartment Maintenance. In this one, he was called back to a unit where someone had already been out. According to Dave, that earlier visit included snaking the toilet several times with a handheld auger, using the extension, and plunging. The toilet still would not flush well.
The bucket test
Dave’s first move was not to grab another tool. It was to find out whether the toilet was actually clogged. He filled a bucket with a couple of gallons of water and dumped it into the bowl. The logic is simple: if all that water goes down quickly, the drain line is not blocked. In his case it did, and he described the sound as free flowing.
That told him the problem was not in the drain at all. A toilet can have a perfectly open pipe and still flush weakly if the water is not entering the bowl with enough force. That sent him looking at the part most people never think about, the underside of the rim.
The hidden flush holes
Under the rim of most toilets is a row of small holes where water rushes in from the tank as you flush. Dave started wiping beneath the rim with some cleaner and dried the area. He says stuff was coming out before he had even started cleaning, and that just by wiping he pulled out a lot of black buildup. His goal was to make sure every one of those flush holes was clean and open, and he guessed they were not.
When those holes fill with mineral deposits or mold growth, the water trickles in instead of rushing in, and the bowl does not get the push it needs to clear. No amount of snaking from the drain end will fix that.
How he cleaned them
Here is where the technique gets clever. Dave grabbed some duct tape and covered the holes under the rim. He says it does not have to be perfect, but it helps to block the holes for a while, and he notes the stronger the duct tape, the better. He admits his was not the best tape.
Then he took the lid off the tank and poured CLR down the overflow tube, the flush tube inside the tank. With the tape holding the holes shut, the cleaner sits in the passage and does its job instead of draining away. His tape held up. He left it to sit for roughly an hour, ran another work order, ate lunch, and came back to see how it did.
Dave also says that most of the time you can get the same result with some bleach and a toilet scrubber. This method is just a deeper clean for toilets that have not been taken care of.
Finishing the job
After the wait, he gave it a quick flush and was surprised by what came out. Then he went after the holes with a toilet brush and anything small enough to reach up into them. He says anything small that can get in there and clear out the mold growth will work. The flush still looked a bit rough, and he did not see much water come out of the back part of the rim, so he went up inside again and worked at it thoroughly.
That did it. On the next test, he could actually see water coming out of the back. He ran one last test and the toilet flushed properly, which he says it did the past three or four times. His verdict: much better.
What homeowners can take from it
- Do the bucket test first. A couple of gallons dumped into the bowl tells you quickly whether the drain is clear.
- Look under the rim. Run your fingers or a cloth along it. Gunk there points to clogged flush holes.
- Try the simple approach. Dave says bleach and a scrubber often do the same job.
- Use the right tools. A small brush or anything slim enough to get into each hole helps clear the buildup.
- Test several times. Dave flushed repeatedly to confirm the fix.
A few cautions are worth adding. Read the label on any cleaner before using it, wear gloves and keep the bathroom ventilated. Never mix cleaning products, since some combinations, bleach and acidic cleaners among them, release dangerous fumes. If you try a product like CLR, use it on its own and rinse well.
Dave says poor flushes are not something he runs into often, and he invited viewers to share how they handle them. But for any homeowner who has already spent a weekend with a plunger and an auger, the lesson is a good one. Sometimes the problem is not what is stuck in the pipe, but what has quietly grown in the holes that make the toilet flush in the first place.
More Stories You May Like
- Home Inspector Checking a Railing Pulled Out a Voltage Tester and Found a Live Electrical Wire Where No Homeowner Would Ever Expect One, and Electricians Are Stunned
- Handyman Shuts Down His Business After Five Years and Hundreds of Jobs and Shares What He Learned
- Gardening Fix After an HOA Violation Shows How One Homeowner Solved It Without Paying a Fine
Leave a Reply