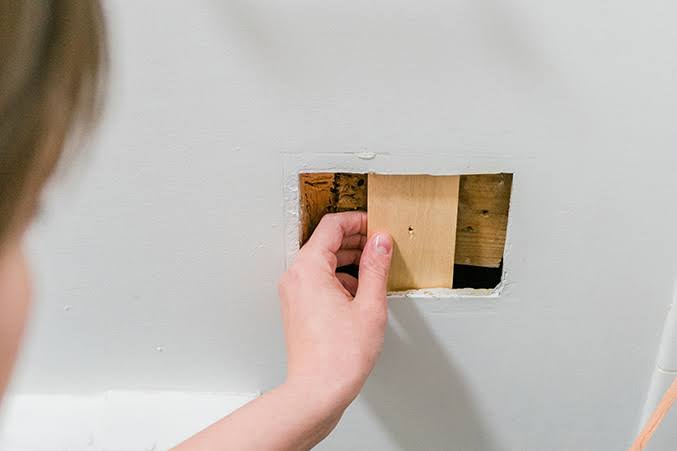
Most drywall patches fail for one of two reasons that have nothing to do with the hole itself. Either the joint compound went on in one thick blob instead of several thin ones, so it shrinks unevenly as it cures and leaves a visible ridge, or the wall gets the right paint color in the wrong sheen, which catches light differently no matter how close the color match is. A patch that actually disappears is built in thin layers and finished with attention to texture and sheen, not just spackle and hope. This guide covers the two situations you’ll actually run into: small holes from nails, screws, and doorknobs, and larger holes that need real backing before any mud goes on.
Small holes (nail pops, screw holes, up to about 2 inches): 30–60 minutes of hands-on work plus drying time, under $10, easy.
Larger holes (fist-sized to several inches): 1–3 hours of work spread across a day or two for drying and curing between coats, $15–30, moderate difficulty.
What You’ll Need
Self-adhesive mesh drywall patch, lightweight spackling such as 3M’s Patch Plus Primer, regular joint compound, a 4- to 6-inch putty knife or combination tool, drywall repair clips or wood furring strips for backing, a scrap of matching-thickness drywall, paper or mesh joint tape, a utility knife or jab saw, medium- and fine-grit sanding sponges, and primer and paint in the matching sheen.
Small Holes: Nail Pops, Screw Holes, and Dings
- Clean the opening. Knock away any loose paper or crumbled gypsum around the edges with a utility knife so the patch bonds to solid material.
- Bridge it with a self-adhesive mesh patch. For holes up to a couple of inches, press a fiberglass mesh patch over the opening so it overlaps the damage by at least an inch on every side, then spread fast-drying spackling over it with a putty knife in a crisscross motion so the compound fully saturates the weave, following DAP’s application steps. Skip the mesh for anything smaller than a pencil eraser.
- Let the first coat harden, then add a second, wider one. USG’s repair instructions call for filling small holes with compound, letting it harden, and adding a second coat if the first one shrank, rather than building the whole patch in one pass. Each coat should feather a bit wider than the last so the edge tapers instead of forming a ledge.
- Sand lightly between coats. Medium grit first, then fine grit, keeping the sanding flush with the wall rather than digging into it.
- Prime and paint. 3M’s Patch Plus Primer is formulated to skip a separate primer step and can be ready to paint in about 30 minutes for a shallow, half-inch-wide repair, per the product’s specifications. Standard spackling still needs a primer coat first so the patch doesn’t flash a different sheen once topcoat goes on.
Larger Holes: Doorknob Dents and Fist-Sized Damage
- Square off the damage. Cut a clean square or rectangle around the hole with a utility knife or jab saw instead of patching the ragged original shape.
- Cut a matching piece of drywall sized to the opening and matched to the existing wall’s thickness.
- Install backing. Drywall repair clips slide behind the cut edges with tabs projecting into the opening; the patch presses against the clips and gets screwed into place, then the tabs snap off, following the method outlined by DAP. Furring strips screwed inside the cavity work the same way without clips. Near a stud, USG’s approach is simpler: cut the damaged section back to the framing and screw the new piece directly to it.
- Tape all four seams with paper or mesh joint tape, then press a layer of compound over each one with a putty knife.
- Build up two to three thin coats, letting each one harden fully before the next goes on and widening the feathered edge with every pass so the seam blends into the wall instead of telegraphing through paint, per USG’s guidance for medium and large holes.
- Sand, then prime with a stain-blocking or high-solids product. USG recommends its own first-coat primer or a flat latex with high solids content over bare compound, since raw joint compound absorbs paint unevenly and can leave a dull, patch-shaped shadow known as flashing.
Match the Texture, Then Match the Sheen
If your wall has orange peel, knockdown, or another sprayed texture, a smooth patch will stand out under raking light even with perfect paint. Aerosol products like Homax’s orange peel texture spray let you dial in spray distance and coat count to approximate the pattern before painting. Sheen matters just as much: flat paint hides imperfections but shows scuffs, while satin and semi-gloss reflect light in a way that makes any leveling difference obvious, and Sherwin-Williams notes that uneven sheen gets corrected by repainting the affected area in the exact original finish, not just the same color name.
When to Call a Pro
Bring in a drywall contractor for several large holes at once, water-damaged drywall (fix the moisture source first, since patching over an active leak just traps the problem), or a textured finish like skip-trowel that’s genuinely hard to blend by hand. Those jobs tend to cost more in redone attempts than in one professional visit.
Leave a Reply