Framing a house means cutting the same piece of lumber over and over, and one slip can throw a whole wall off. That is why a builder in South Central Montana swears by a stop block he made himself. Buzz, who shares his build on Build With Buzz, is putting up a passive solar barndominium with his wife on their property, and he used a homemade stop block to cut four identical studs for a tub alcove wall.
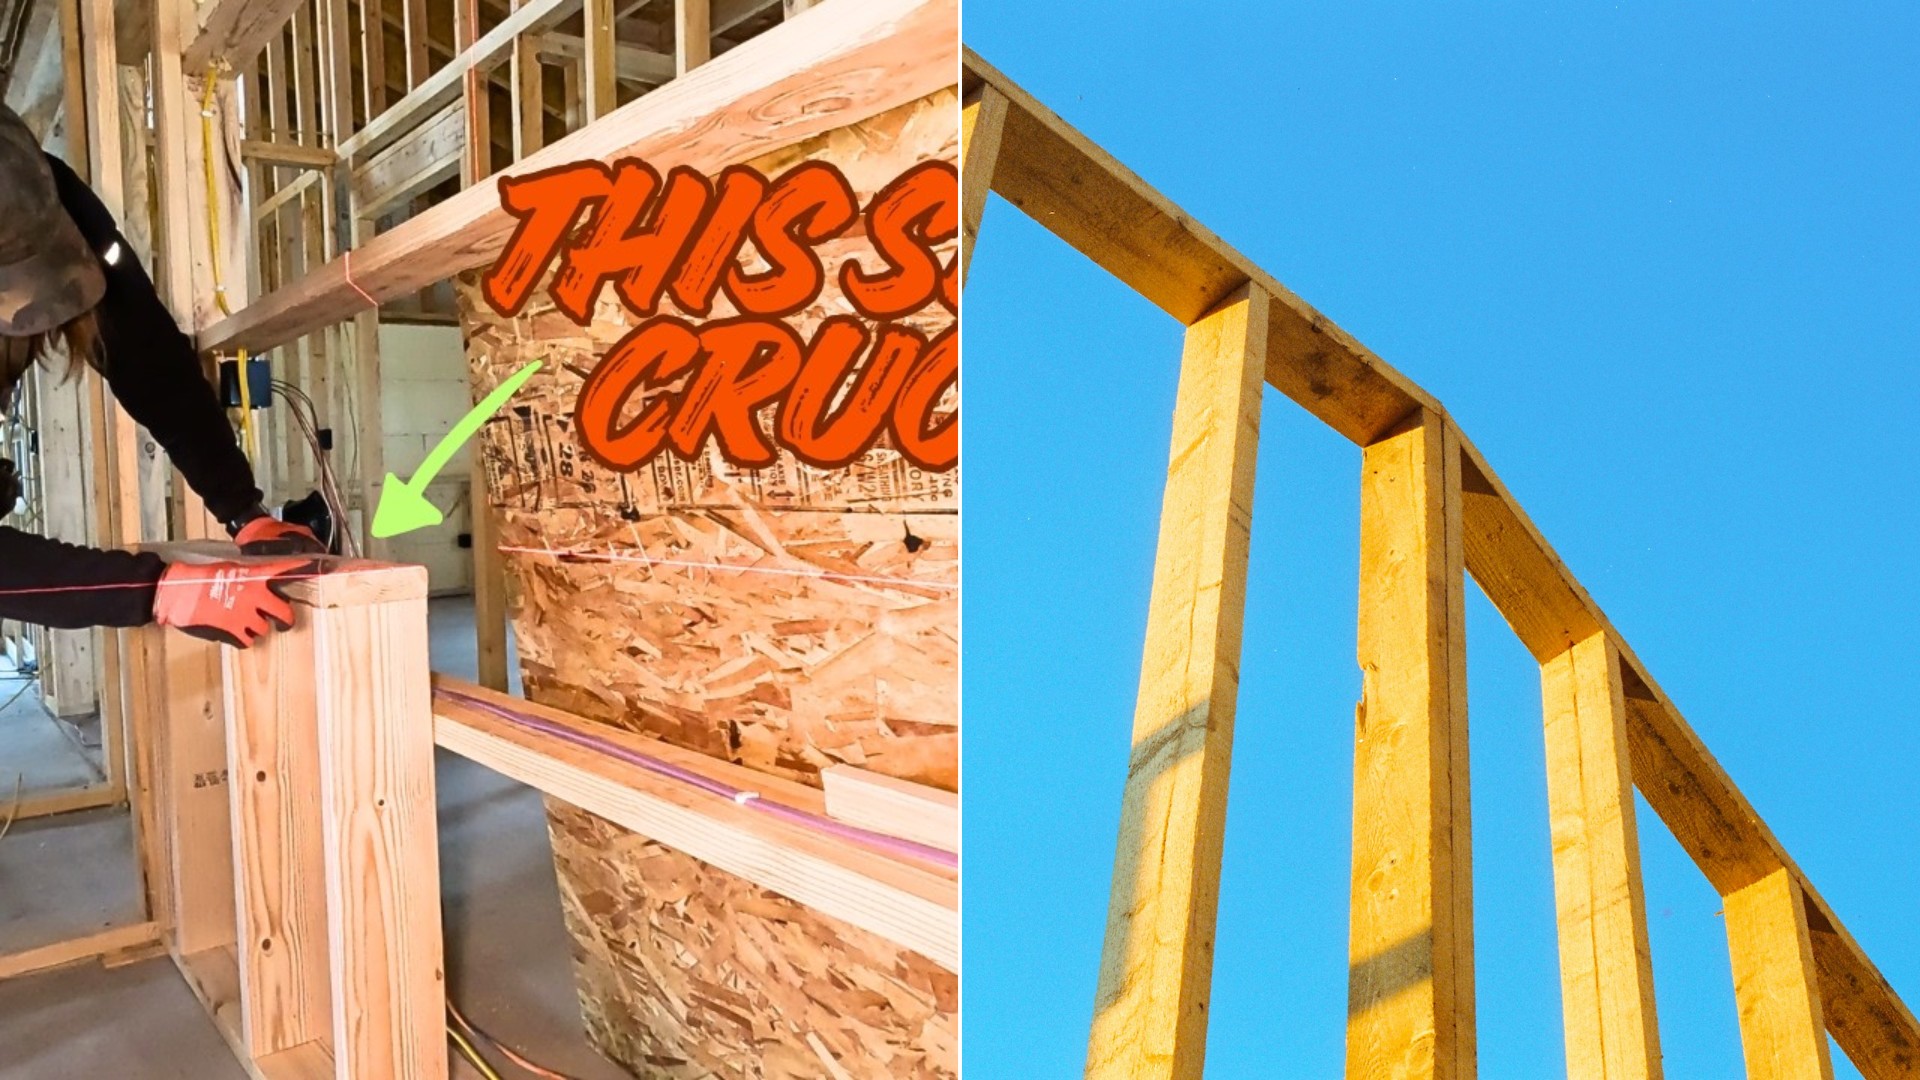
The builder says the electrician had spent a few days in the house, so it was time to button up the rough framing. The walls were done, but a few changes were still on the list.
A Pony Wall Around A Freestanding Tub
The job was a pair of pony walls in the bathroom alcove that will surround a freestanding tub. The tub they chose is about 8 inches narrower than the space, which leaves room to frame a 2 by 6 pony wall at the back, where the faucet can be plumbed in. A 2×4 pony wall goes on the other side to save as much room as possible in the little walkway.
He plans to cover the pony walls in tile and top them with a nice hardwood sill that works as a shelf. He marked the tub dimensions on the concrete floor and found the outside face of the tub lands at about 35 inches. He then decided to bring the back wall out a couple of inches so it nests into the corner, making the wall 38 inches long without getting in the way of the walkway.
The Stop Block Trick
With a 38 inch wall, the plan called for four studs in the little wall, all exactly the same length. Instead of measuring and marking each one, he used the chop saw and a simple stop block. First he made his measurement, brought the blade down to indent the board and confirmed the spot was right where it needed to be.
The stop block itself is nothing fancy. He says it is basically two 2 by 6s screwed together, checked with a square to be sure one board sits square to the other. He sets it on the saw fence and outfeed bar, clamps it down, and checks that it does not move. Each piece he cuts slides up and bumps into the block, so the distance between the block and the blade is always exactly what he needs. The result, in his words, is four identical pieces, ready to build a wall.
Why does it work? A stop block removes the tape measure from the process after the first cut. Every piece comes out the same length, and the saw does the repeating. That matters in framing, where studs that vary by even a sixteenth of an inch can leave a bow in the wall.
Building And Anchoring The Wall
To assemble the wall he used a framing nailer with 3 inch interior nails. The back was a bit low, so he slipped in a shim, set the wall in place, and popped a couple of nails in to hold it. He then used Tapcons to anchor the bottom plate into the concrete. The second wall was the same process in 2×4.
The second wall was not perfectly plumb, so he adjusted. He pushed it tight to the other plate, which opened a small gap behind a stud, and he fixed that with a shim and toenailed through it. He says construction lumber does what construction lumber is going to do, which is move and change with humidity and temperature swings, especially after a house has just been dried in. The wall had been framed a month or so before.
His tip for anchoring is to place a good, solid shim under the plate before driving the Tapcon. Otherwise, he warns, the screw will pull the plate down and throw everything out of whack.
Other Jobs On The List
Earlier in the day he decked a little reading nook framed in over the nursery closet. He used sheets of 7/16 OSB and 2 3/8 ring shank nails, which he says are plenty when you are working inside. He had enough OSB for only one piece, but leftover scraps of ZIP sheathing covered the rest, and since flooring will go over it, he says it is no big deal.
He also framed the hearth for his wood stove. He taped up pieces of cardboard to show the footprint of the stove, set it in the corner, and used it to judge how big the framing needs to be. He did not want the hearth to be overly big or to crowd the living space. He framed it from 2 by 6s because stone goes on top, cut the corners on the chop saw at 45 degrees, tacked it together and added supports. A level across the top showed it needed a tiny shim at the back.
Framing Tips You Can Use
Whether you are building a barndominium or fixing up a bathroom, these lessons carry over:
- Build a stop block when you need several pieces of the same length. Two boards screwed together and clamped to the saw can do the job.
- Mark the first cut carefully and check the block before you commit to the rest.
- Use shims to deal with floors or walls that are slightly off, rather than forcing the lumber.
- Seat the plate on a solid shim before you drive concrete anchors.
- Cut a cardboard template of anything big, like a wood stove, before you frame around it.
Buzz sums up his approach plainly. He says he never claims to know everything, but he tells viewers what he does understand and why he does it. For anyone cutting a batch of studs this winter, a simple stop block is a smart way to start.
More Stories You May Like
- Landlords Who Ignore Repairs Do Not Give You Permission To Stop Paying Rent So Document Everything And Know Your State Rules First
- Inspector Finds A Water Heater Sitting On Bricks, A Garage Door Opener On An Extension Cord And Mold Everywhere In The Attic Of An Old House
- Three New York City Laws Every Renter Should Know Before Signing a Lease Including Broker Fees Being Illegal When the Landlord Hired the Broker and One Month Deposit Limits
Leave a Reply