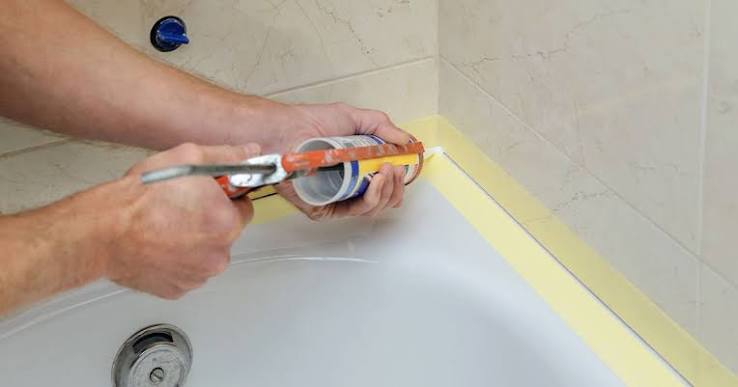
Most bathroom caulk doesn’t fail because of bad luck or shaky hands. It fails because the person applying it skipped a step that doesn’t feel important at the time: pulling every scrap of the old bead, letting the surface actually dry, or picking a caulk never meant to sit in standing water. The result is a gray, peeling seam within six months instead of a clean line that lasts for years. The fix is a specific process, not a better squeeze technique.
Time: 30-45 minutes of hands-on work, plus 24 hours of undisturbed cure time before you shower Cost: Under $10 in materials Difficulty: Beginner to moderate, since the removal step is the only part that takes patience
What You’ll Need
- Caulk removal tool or a sharp utility knife
- Plastic putty knife or razor scraper
- Isopropyl (rubbing) alcohol
- Warm water and dish detergent (for any mold or soap-scum residue)
- Clean rags or paper towels
- Painter’s tape (optional, for a straight edge)
- 100% silicone caulk rated for kitchen and bath
- Caulking gun
Why the Old Bead Fails Fast
Using the wrong product is one common cause. Standard acrylic latex caulk is easy to paint and easy to smooth, but it isn’t built to sit in continuous moisture, and manufacturer comparisons note it “doesn’t work well in areas exposed to high moisture,” which describes a tub surround exactly. Skipping surface prep is another: caulking over leftover residue, soap scum, or a surface that looks dry but isn’t. DAP’s own removal guidance is blunt about this: “Make sure the surface is completely dry before applying new caulk. Any remaining moisture can prevent proper adhesion and compromise the seal.” Impatience finishes the job off, running the shower before the bead has actually cured, which reopens the seam from the inside before it ever bonds.
1. Remove All the Old Caulk
Don’t caulk over what’s already there. Use a caulk removal tool or utility knife to cut along both edges of the old bead, then work a plastic putty knife or razor scraper underneath to lift it free. For stubborn or layered sections, needle-nose pliers help pull larger chunks loose. New sealant bonds to the tile and tub, not to old caulk, so every trace has to come off before you move on.
2. Clean and Fully Dry the Surface
Once the bead is gone, wipe the seam with isopropyl alcohol to dissolve leftover residue on tile, fiberglass, and porcelain. If you see mold or mildew staining, DAP recommends cleaning it with warm water and dish detergent, specifically noting that bleach isn’t recommended because it “doesn’t effectively clean porous surfaces like grout.” After cleaning, let the area air dry for a couple of hours rather than towel-drying and moving straight to application. Trapped surface moisture is one of the most common reasons a new bead lifts within weeks.
3. Choose 100% Silicone, Not Standard Acrylic Latex
For any seam that sees regular water contact, such as tub-to-tile, a shower pan, or a sink backsplash, pick a 100% silicone sealant or a silicone-acrylic hybrid specifically labeled for kitchen and bath use, rather than a general-purpose acrylic latex. Silicone keeps its elasticity as the tub flexes, and manufacturer testing describes it as offering “longevity and resistance to mold and mildew growth” that standard latex caulk can’t match in a wet environment. The tradeoff is that silicone isn’t paintable, so save latex for trim you plan to paint and reserve silicone for the water-contact seams.
4. Cut the Tip and Apply the Bead
Cut the cartridge tip at a 45-degree angle, sizing the opening to match your gap width rather than cutting it larger than needed. Hold the gun at that same 45-degree angle and squeeze the trigger steadily, moving the nozzle in one continuous pass so the bead comes out even, per DAP’s application guidance. Stopping and restarting mid-seam creates the lumpy beads that trap water later.
5. Tool It Immediately
Wet a finger with warm water so the silicone won’t stick to your skin, then slide it along the bead in one smooth motion to press the caulk into the joint and remove excess. A caulking tool works the same way if you’d rather not use a finger. Silicone typically stays workable for only 10 to 15 minutes before it starts to skin over, so tool it right after application, not after you’ve finished the whole tub.
6. Let It Cure Before Any Water Touches It
This is where most re-caulk jobs get undone. DAP’s technical data for its kitchen-and-bath silicone lists water resistance at around 30 minutes under standard conditions, but full cure strength at 24 hours, and its own shower-caulking guidance recommends avoiding the area for a full 24 hours for best results even on products that tolerate water sooner. Run the bathroom exhaust fan during that window and for your first few showers after, since lower humidity around the bead helps it finish curing and resist early mildew. If a fresh silicone seam keeps cracking or pulling away every few months despite correct prep, the caulk usually isn’t the problem anymore. That pattern is a sign the tub or the wall framing behind it is moving, and the structural issue needs attention before any new bead will hold.
Leave a Reply