Some projects live in your head for months before you work up the nerve to start them. For Blayke Silva, it was a custom entertainment center for the upstairs game room she had already made over. She planned to build the cabinets herself. Then she did a little research and found a shortcut that changed the budget and the workload.
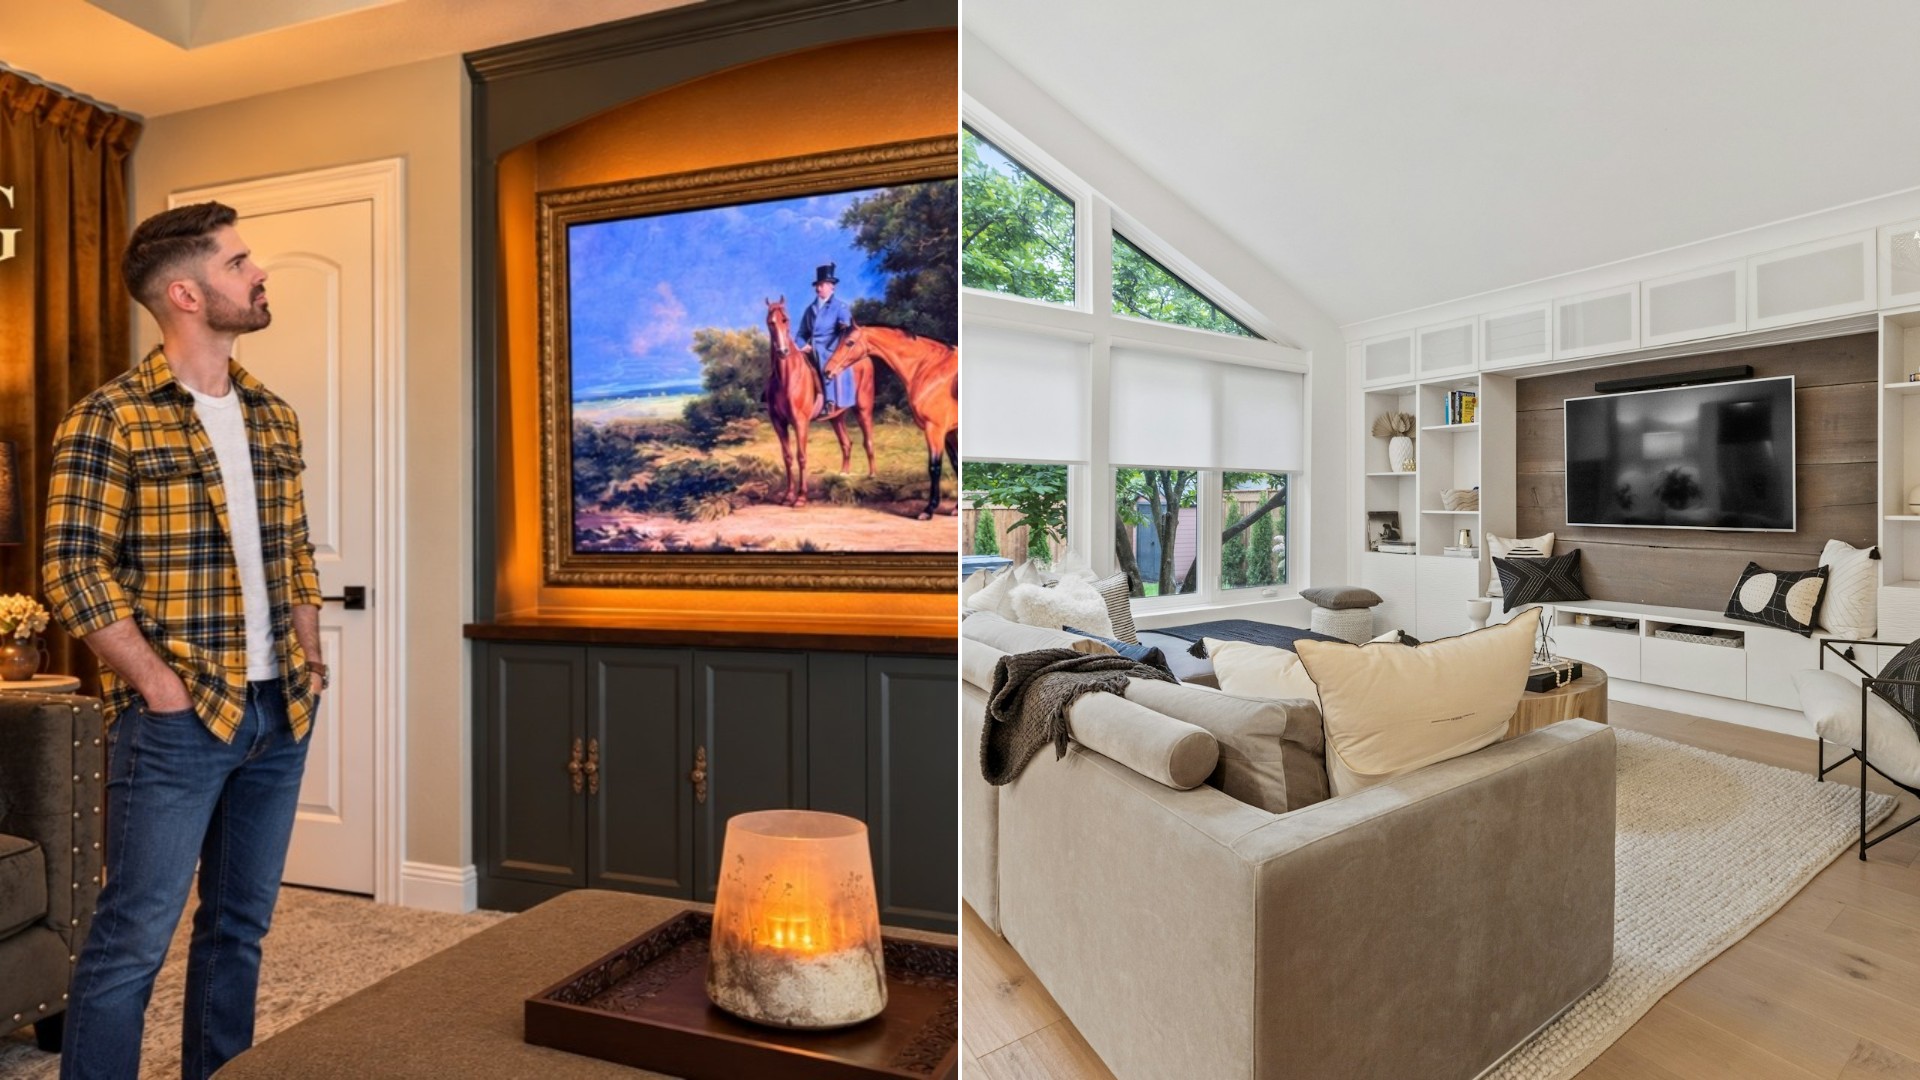
Her plan was simple: tuck a built-in look into a little nook that had been “begging for something more substantial,” as she puts it. Her goal was something that felt like it had always been part of the room, not an afterthought. The cabinetry was the starting point, and that is where she changed course.
After looking around, she realized she could buy pre-made cabinets for about the same cost as building, with far less effort. She had specific measurements to hit and wanted inset doors. After what felt like endless searching, she found cabinets on Amazon that would get close with a few modifications. Her finished version, she says, comes to right around $700.
That number looks even better next to the alternative. She got a quote to have the entertainment center professionally built, just in case the job turned out to be too much, and it came back at $6,500. She does not think that price is unreasonable, given the skill and labor in custom cabinetry. But it is a lot, and she was happy to trade perfection for savings. As she says, the little imperfections will bother her less knowing how much money she saved.
Making Store-Bought Look Built-In
The trick to a “custom” look is in the details, and she shares many. She scored the caulk and removed the baseboard so the cabinets could sit flush against the wall. An outlet landed right at the corner of one cabinet, so she had to cut room to keep it accessible. She braced the cabinet with 1 by 2 boards to prevent racking, which is when a cabinet starts to lean out of square, and the same boards tie the two cabinets into one solid unit.
Walls are rarely square, so she shimmed until everything was level. Seams on the front were filled with plastic wood, and she even moved a handle to the opposite side of one door for symmetry, which meant filling the old holes. She admits that means opening one door before the other, but she rarely needs her DVDs anymore.
Because the cabinets have a slick finish like you find on some flat-pack furniture, she used an adhesion primer designed for slick surfaces so the paint would stay put. She chose Roycroft Bronze Green from Sherwin-Williams, applied two coats, and admits painting cabinet doors is one of her least favorite jobs.
Oops Moments, Honestly Shared
What makes her video fun is that she shows the mistakes. She tried to transfer the outlet location to the back of a cabinet by dabbing toothpaste on the corners of the box, a tip she saw in several videos. It went badly, and she blames operator error. Later, with the saw, she hit some kickback and gouged her brand-new countertop. Her fix was to flip the countertop over so the flaw sits on the underside. Her takeaway is a good one for all of us: never let your guard down with power tools.
The countertop itself is a chevron butcher block she found at Lowe’s for half off. She used a gel stain for the first time, hoping for less dripping and a more even color. Hardware came from Hobby Lobby, where everything was 40 percent off, and she used Rub ‘n Buff to bring out the details in the pulls.
The Arch and the Frame
The part she dreaded most was the arch. Her solution was clever: bend a thin piece of lattice trim between three nails to create a curve you can trace. A jigsaw gets you close, she says, and then it takes sanding and a little more sanding. She was shocked how well it turned out. For hiding joints, she used a slightly damp rag on the filler while it was still workable, which feathered the edges and made a lot less dust than sanding.
The TV got a frame made from crown molding, joined with wood glue and small L-brackets. Her advice: measure to the inside points of the 45 degree cuts, not along the outside, and make the opening about an eighth of an inch smaller on each side so the TV’s border does not peek through. She finished it with flat black spray paint, metallic wax finish and a bit of wax for an aged look, then added warm 2,000 Kelvin strip lighting behind it.
What To Take From It
- Price a professional quote first. It helps you decide whether to DIY and how much to splurge.
- Pre-made cabinets plus trim, filler and paint can give a built-in look for a fraction of the price.
- Use studs when you can, and good toggle bolts and washers when you cannot.
- Expect a mistake or two and plan a way to hide it.
Blayke says she could not be happier. Her game room project may not be perfect, but it looks like it was always meant to be there, and the savings make the small flaws easy to live with.
Leave a Reply