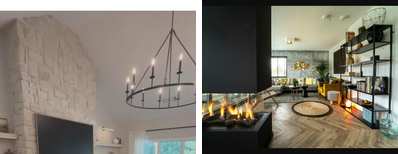
@theweekendbuilder has spent his weekends chipping away at a full fireplace and surrounding wall renovation, and the latest installment shows just how far the space has come. What used to be a dated, builder-grade fireplace wall is now a floor-to-ceiling feature built to anchor the whole room, with clean lines and a finish that looks intentional rather than tacked on. The creator says this room is now his favorite in the house, which is a notable claim after what he describes as several rounds of trial and error along the way.
Part of what makes the series compelling is the honesty baked into it. Rather than presenting a single polished reveal, the creator has posted roughly seven parts documenting the project, including the missteps, which gives followers a far more realistic look at what a DIY fireplace remodel actually involves than a highlight-reel transformation would. That transparency, paired with a genuinely dramatic before-and-after, is a big part of why the series has built such a loyal following.
A fireplace wall renovation is one of the more involved DIY projects a homeowner can take on, mostly because it sits at the intersection of several different skill sets at once. Framing out a new surround, whether it’s built from wood, stone veneer, or a mix of both, requires accurate measurements and level work from the start, since even a small error compounds as the structure rises toward the ceiling. Most DIYers who tackle this kind of build start with a scaled drawing or mockup before cutting a single board, which helps catch proportion problems while they’re still cheap to fix.
Material choice tends to be the first major decision point, and it has a big effect on both cost and the final look. Stone veneer panels have become a popular option because they deliver the texture of a full masonry fireplace at a fraction of the weight and installation difficulty, often clicking or gluing into place over a plywood substrate rather than requiring mortar and a mason. Shiplap, tongue-and-groove paneling, and simple drywall with trim detailing are the more budget-friendly routes, each capable of a strikingly modern result depending on the paint color and hardware chosen to finish it off.
Heat clearance is the detail that trips up a surprising number of first-time renovators. Building codes and manufacturer specifications set minimum distances between combustible materials and a firebox or insert, and those clearances vary depending on whether the unit is wood-burning, gas, or electric. Skipping this step isn’t just a safety risk — it’s also one of the more common reasons a DIY fireplace project fails an inspection or has to be partially rebuilt, so confirming the exact clearance for the specific unit in use before any framing goes up is worth the extra research time.
Budget for a project like this varies enormously depending on how much is built versus bought. A DIYer handling their own framing, veneer installation, and finish work might spend anywhere from a few hundred dollars for paint and trim on an existing fireplace to several thousand for a full stone veneer surround with a new mantel and built-in shelving on either side. Hiring the same scope out to a contractor typically runs several times higher once labor is factored in, which is a big part of the appeal of documented DIY series like this one — they give other homeowners a real sense of what’s achievable without a crew.
Built-in shelving or cabinetry flanking the fireplace, which shows up frequently in these kinds of renovations, adds both storage and a sense of architectural intention to the room. These built-ins are typically framed separately from the fireplace surround itself and then tied in with matching trim, which means they can often be added in a later phase without disrupting the main structure — a useful option for anyone tackling a project in stages the way this creator has over seven parts.
For anyone inspired to start their own version, the most common advice from experienced DIYers is to resist the urge to rush the planning stage. Confirming clearances, sourcing materials, and sketching the final layout before demo day tends to save far more time than it costs upfront, and it’s often the difference between a fireplace wall that looks cohesive and one that reads as a patchwork of good intentions. A project documented in parts, the way this one was, also makes it easier to course-correct along the way rather than committing to a single irreversible plan from day one.
More from Willow and Hearth
- Husband quietly built his wife’s dream home library from scratch as a surprise and the final reveal of the finished space has become one of their most cherished renovations
- Creator kept getting asked whether sacrificing their entire dining room to build a home office was actually worth it and the before and after answers the question instantly
- Creator says she was quoted thousands of dollars for new countertops and instead found a way to get nearly the same look for a small fraction of the price on her own
Leave a Reply